


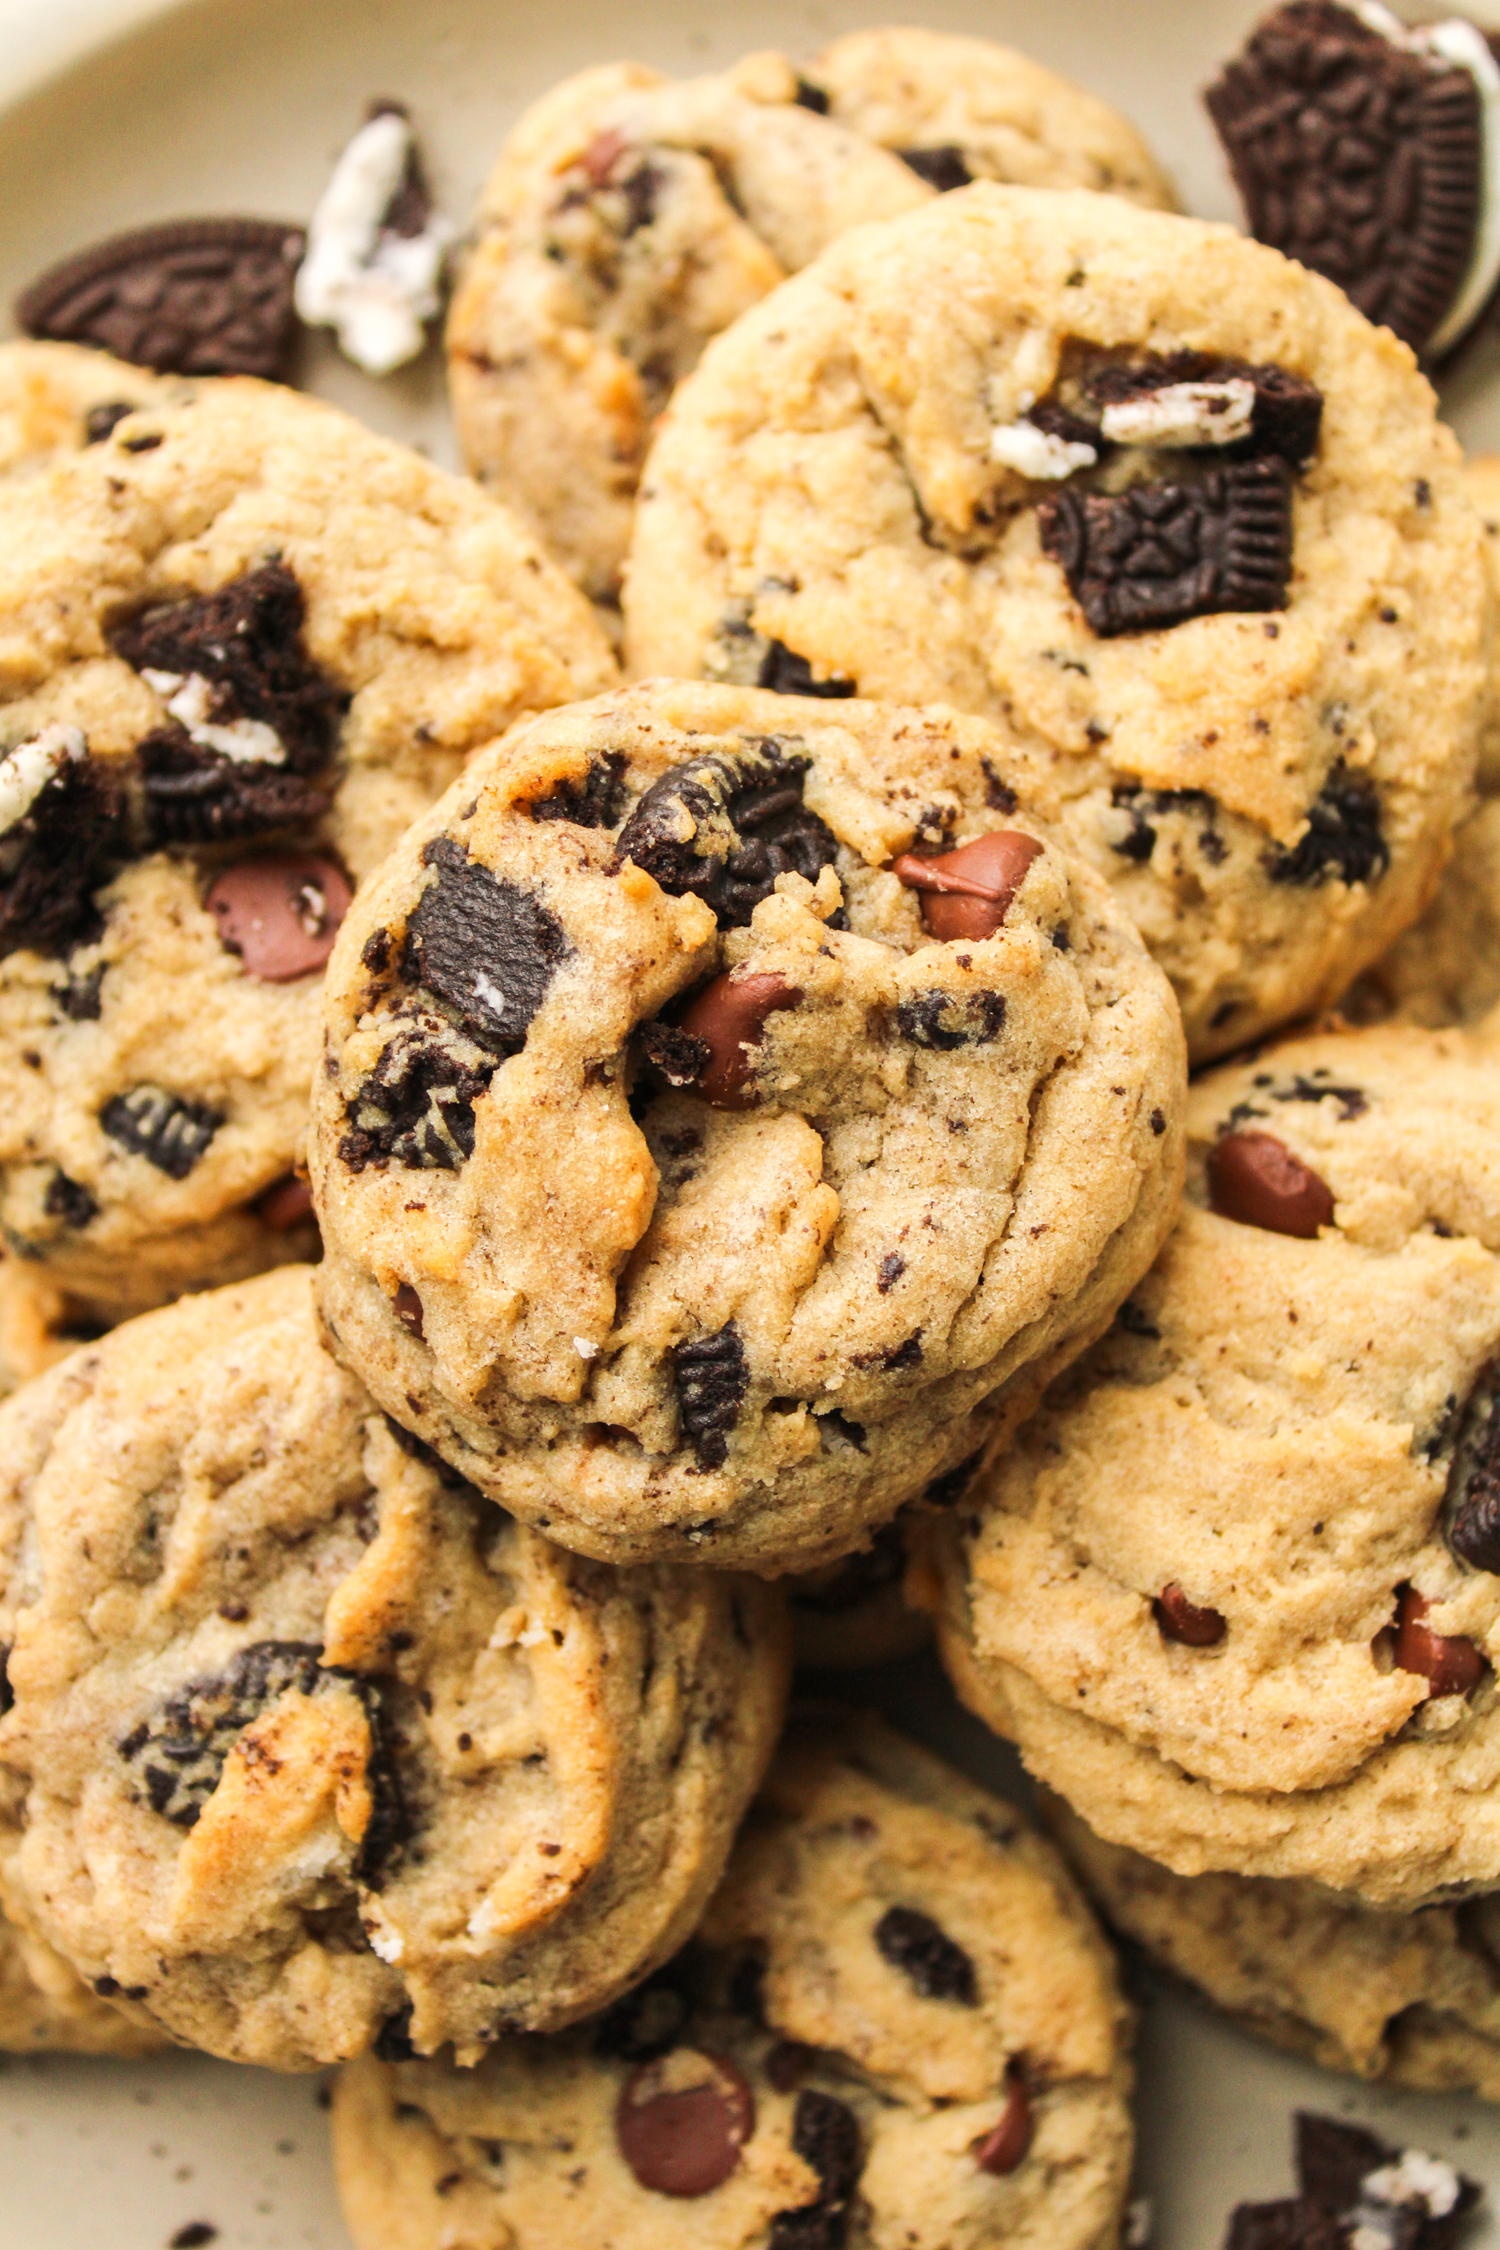
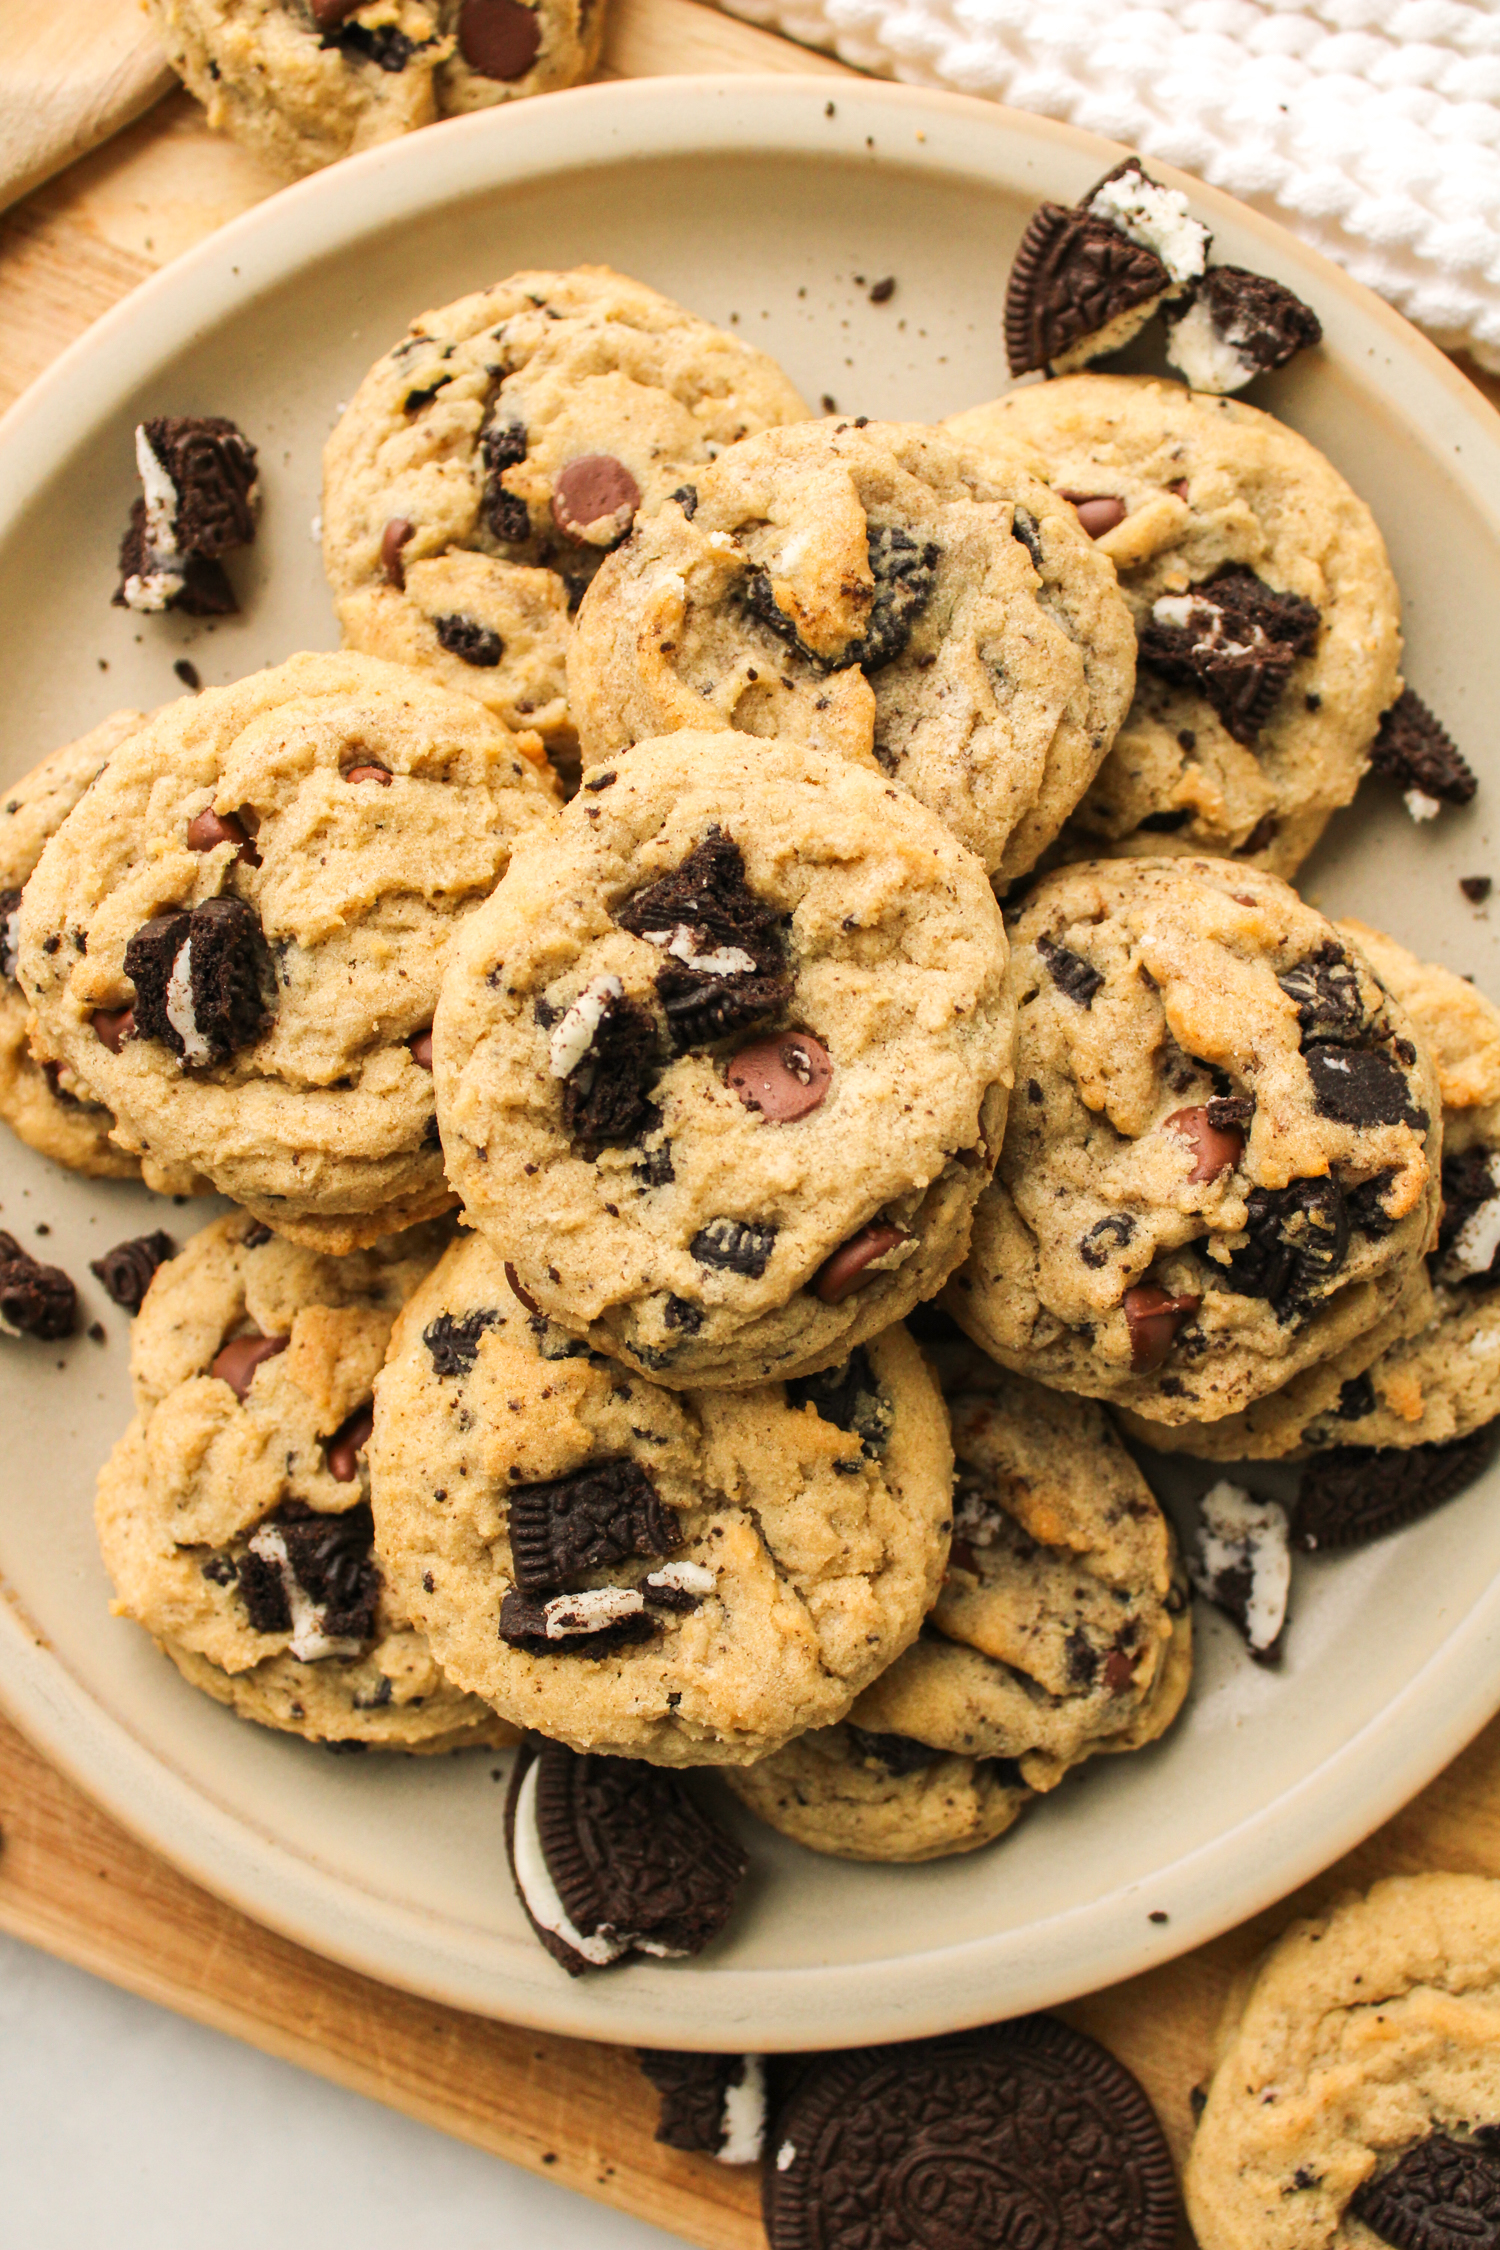
Oreo and Chocolate Chip Cookies
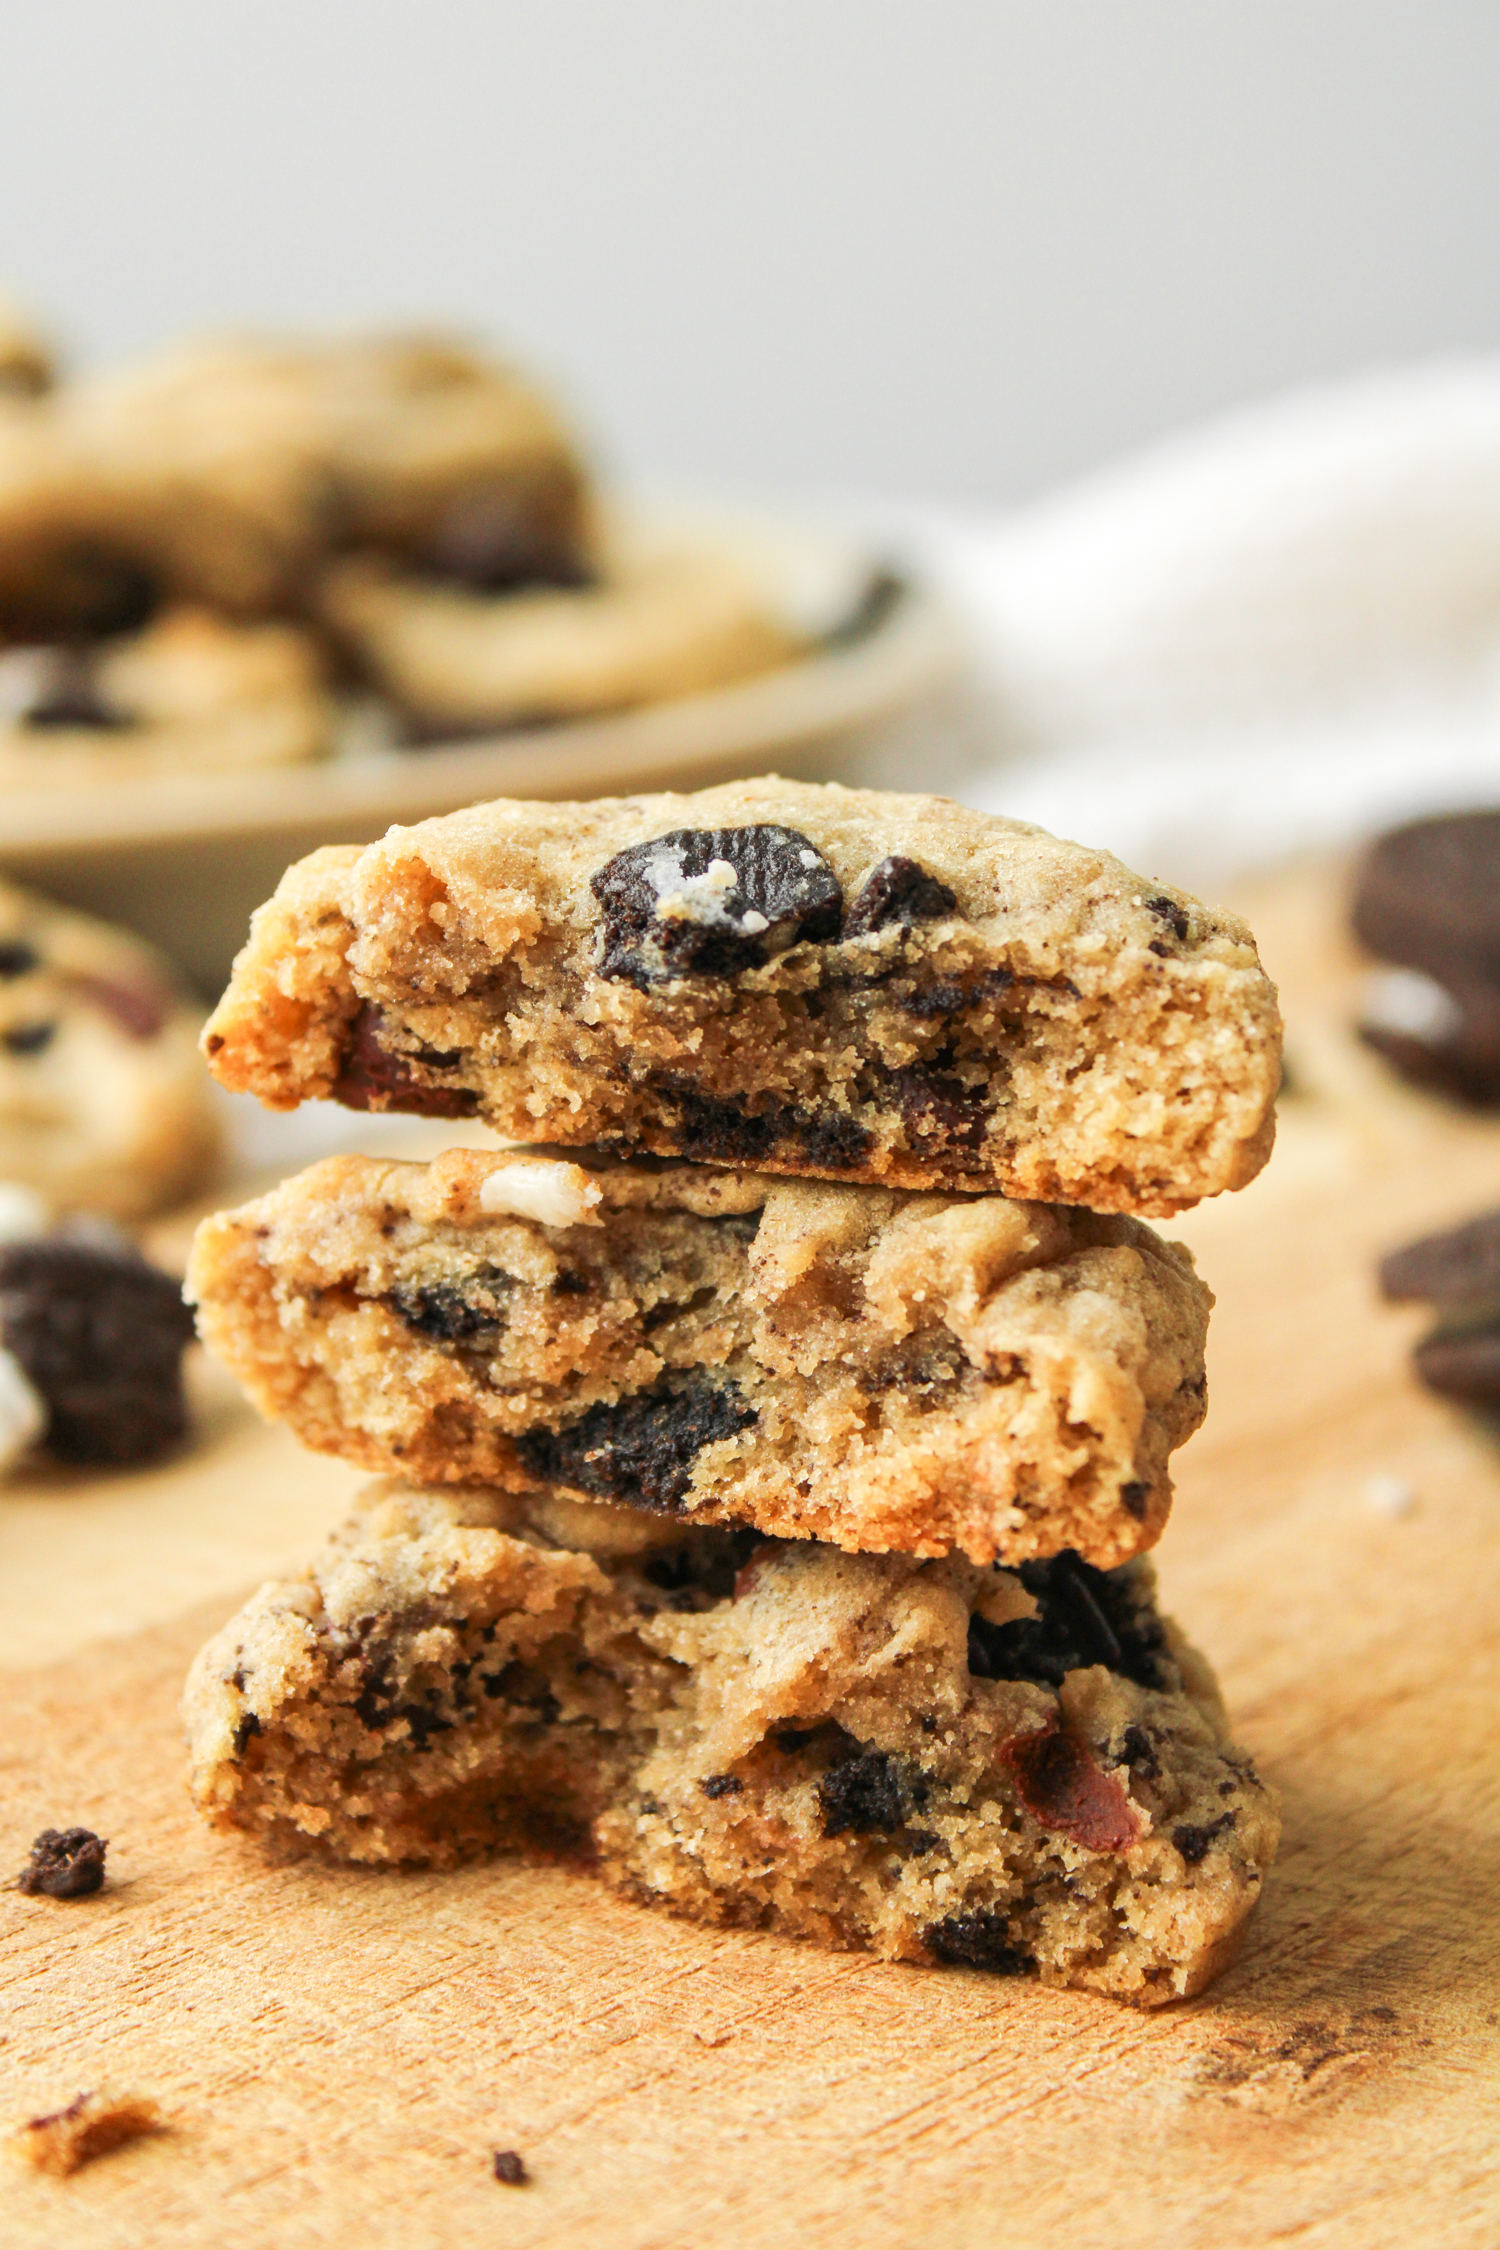
The dough of these Oreo and Chocolate Chip Cookies is super soft and chewy but it’s packed with the crunchy chocolate texture of Oreos. Sprinkled with chocolate chips and baked to perfection, these cookies will be your new favourite dessert!
This blog post contains recommended product links. As an Amazon Associate I earn from qualifying purchases.
Why you need to make these cookies
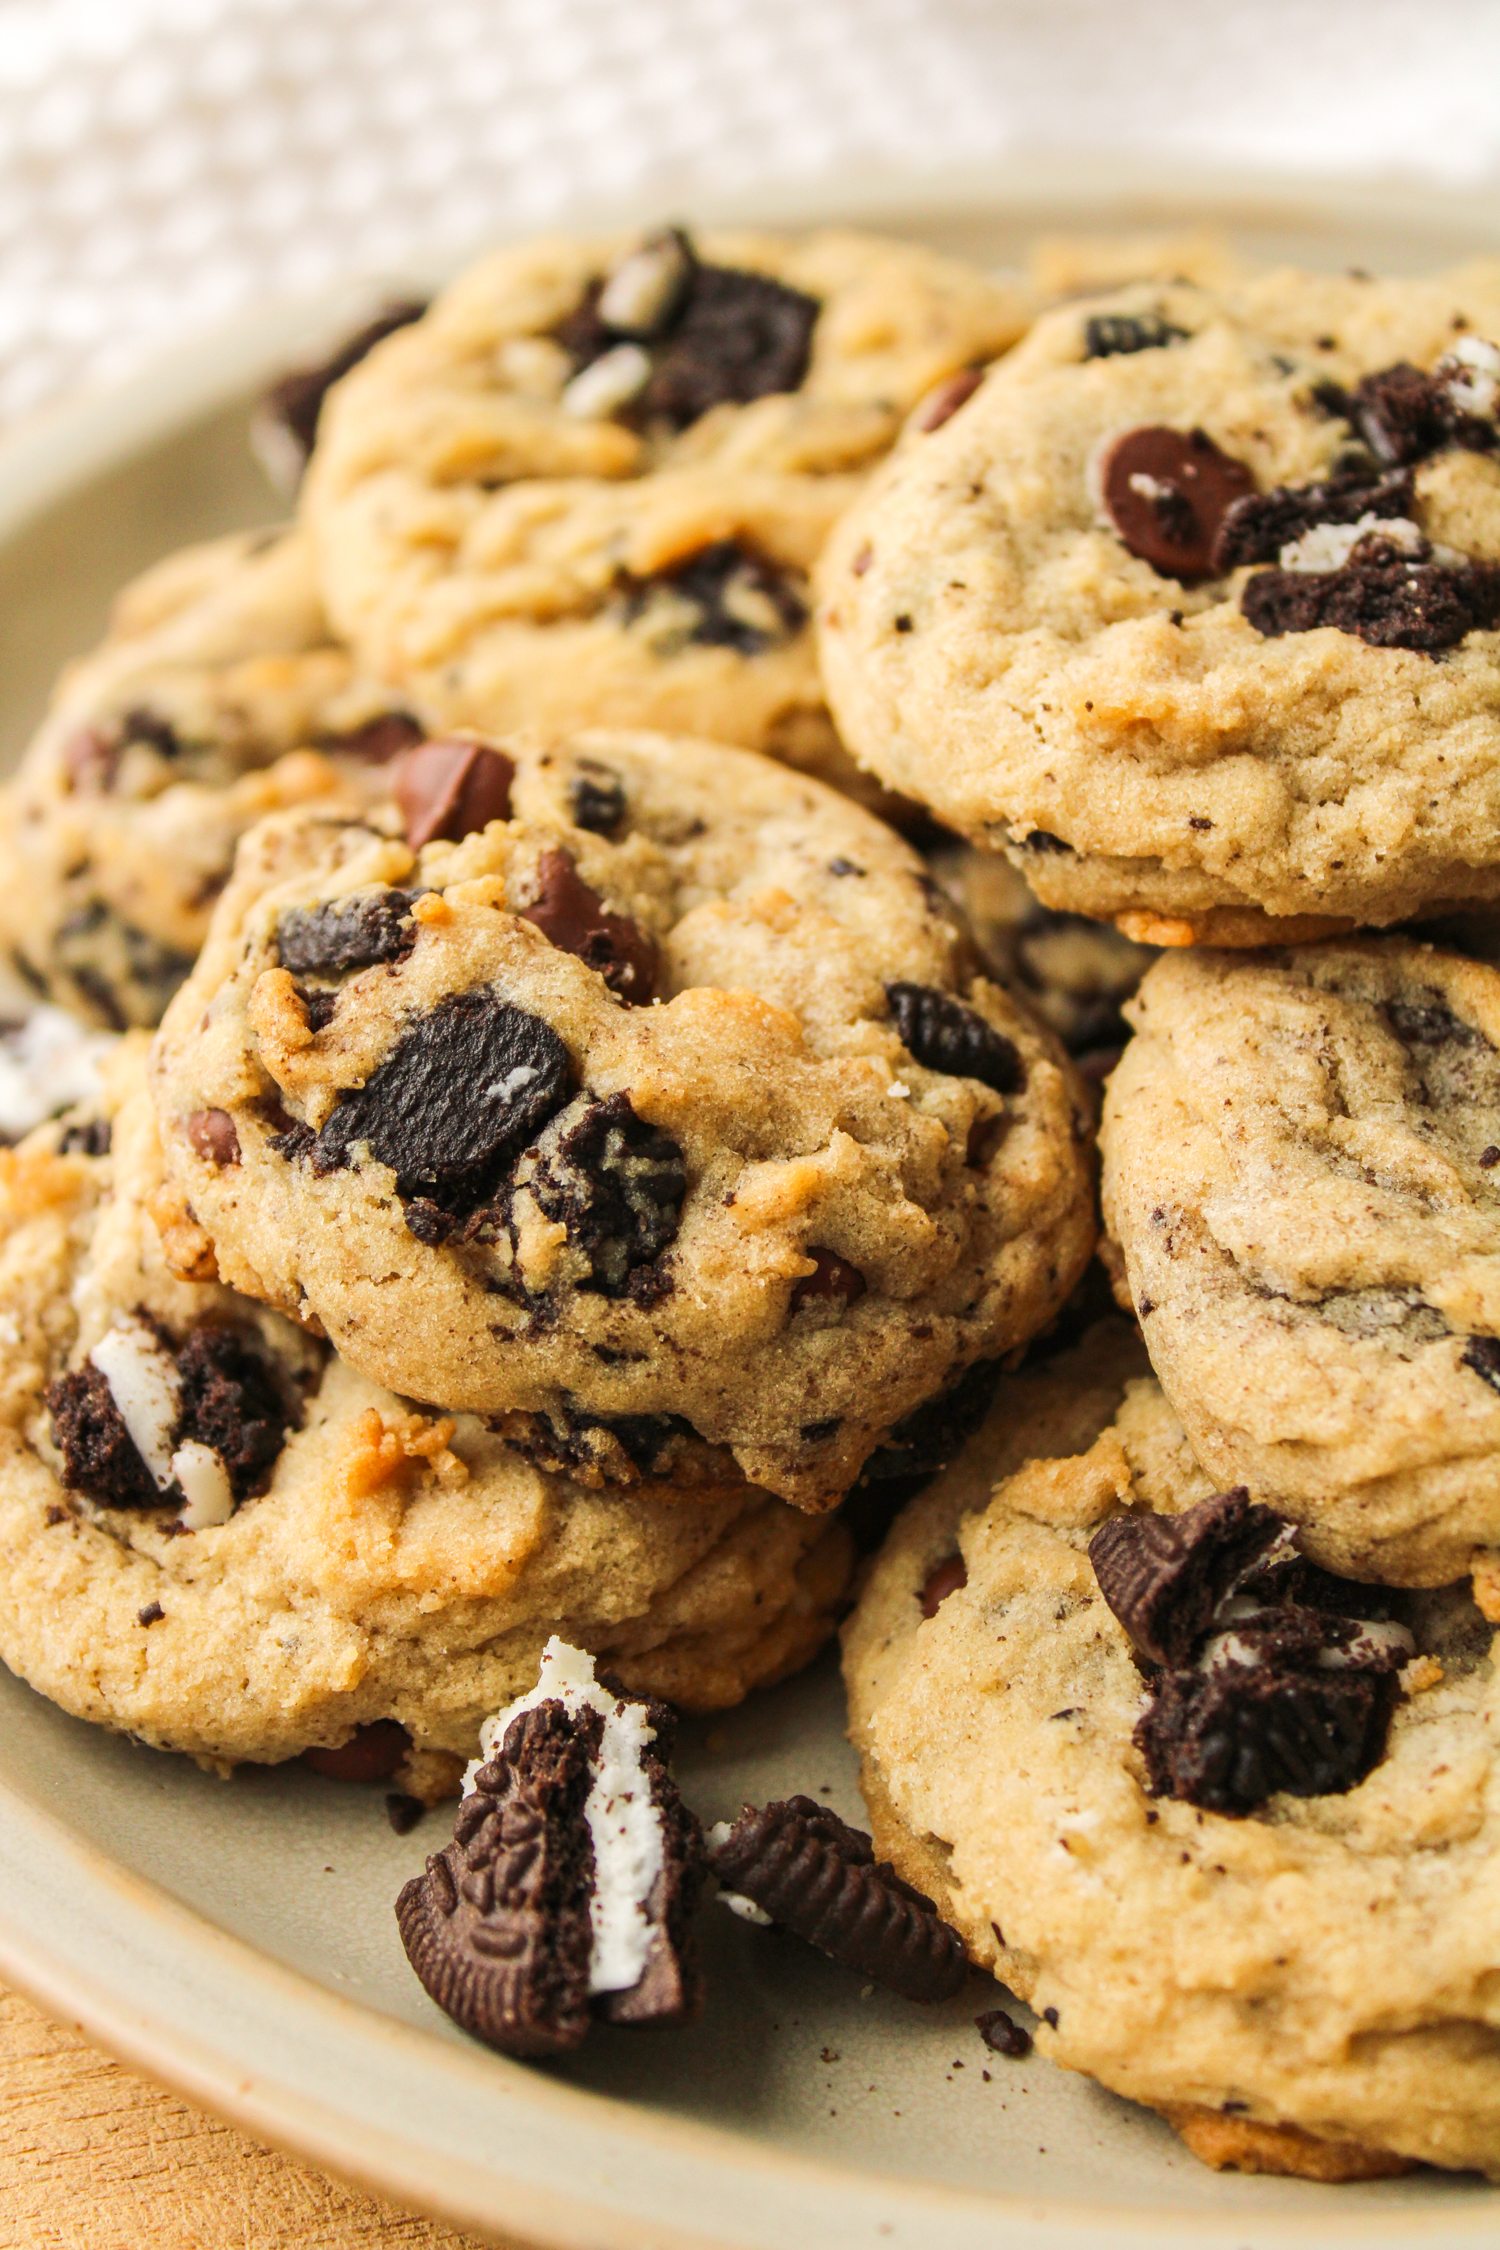
I feel pretty confident that once you make a batch of these cookies, you may never go back to regular chocolate chip cookies. Even though I love the traditional version, adding chopped Oreo cookies to this batter takes the flavour and texture to the next level.
You can also make a large batch of these by doubling or tripling the recipe so that you have extra to keep in the freezer or gift to loved ones.
Feel free to add extra chocolate chips or Oreo crumbs until the final result meets your preference! You can never go wrong with more chocolate, right?!
These cookies are:
- Soft and chewy
- Crunchy throughout
- Easy to make
- Freezer-friendly
- Crowd-pleasers
Ingredients needed
Here’s what you need to make these homemade Oreo and Chocolate Chip Cookies:
- All purpose flour
- Salted butter
- Light brown sugar
- White sugar
- Egg
- Oreos
- Semi-sweet chocolate chips
- Vanilla extract
- Baking soda
- Salt
Substitutions and add ins
If you don’t have some of the ingredients or you would prefer to make some substitutions, here are my recommendations:
- Gluten free flour
- To make these cookies gluten free, use gluten free all purpose 1:1 flour in the same amount that’s recommended for the all-purpose flour. You may not get the same chewy texture with the gluten-free flour but the flavour will be very similar!
- Unsalted butter
- I use salted butter in baking because I feel like a little extra salt goes a long way in amplifying the flavour. However, you can use unsalted butter if that’s what you have or if you’re being mindful of your sodium intake.
- Coconut oil
- This can be used instead of the butter. Make sure that it’s at room temperature before mixing it with the brown sugar.
- Other types of brown sugar
- Any kind of brown sugar will work in this recipe.
Add-ins
- Sweetened or unsweetened shredded coconut
- You can use whatever product you have available. If you want the cookies extra sweet, use sweetened shredded coconut.
- Flaked coconut
- If you want larger chunks of dried coconut in the cookies, use flaked coconut instead of shredded!
- Chopped nuts
- Nuts such as almond, pistachios, pecans and walnuts could all be chopped and added to the cookie batter for more crunch. Just make sure to buy the unsalted version.
- Mini chocolate chips or chocolate chunks (white, milk, semi-sweet or dark)
- Feel free to play around with the size and shape of the added chocolate.
How to make Oreo Chocolate Chip Cookies
Here’s how to make these Oreo Chocolate Chip Cookies:
- First, make sure to preheat the oven to 350F so it has time to heat up. Next, prepare your baking sheet. You can either grease it with butter or coconut oil or line it with silicone baking mats or parchment paper. Set this aside while we prepare the dough!
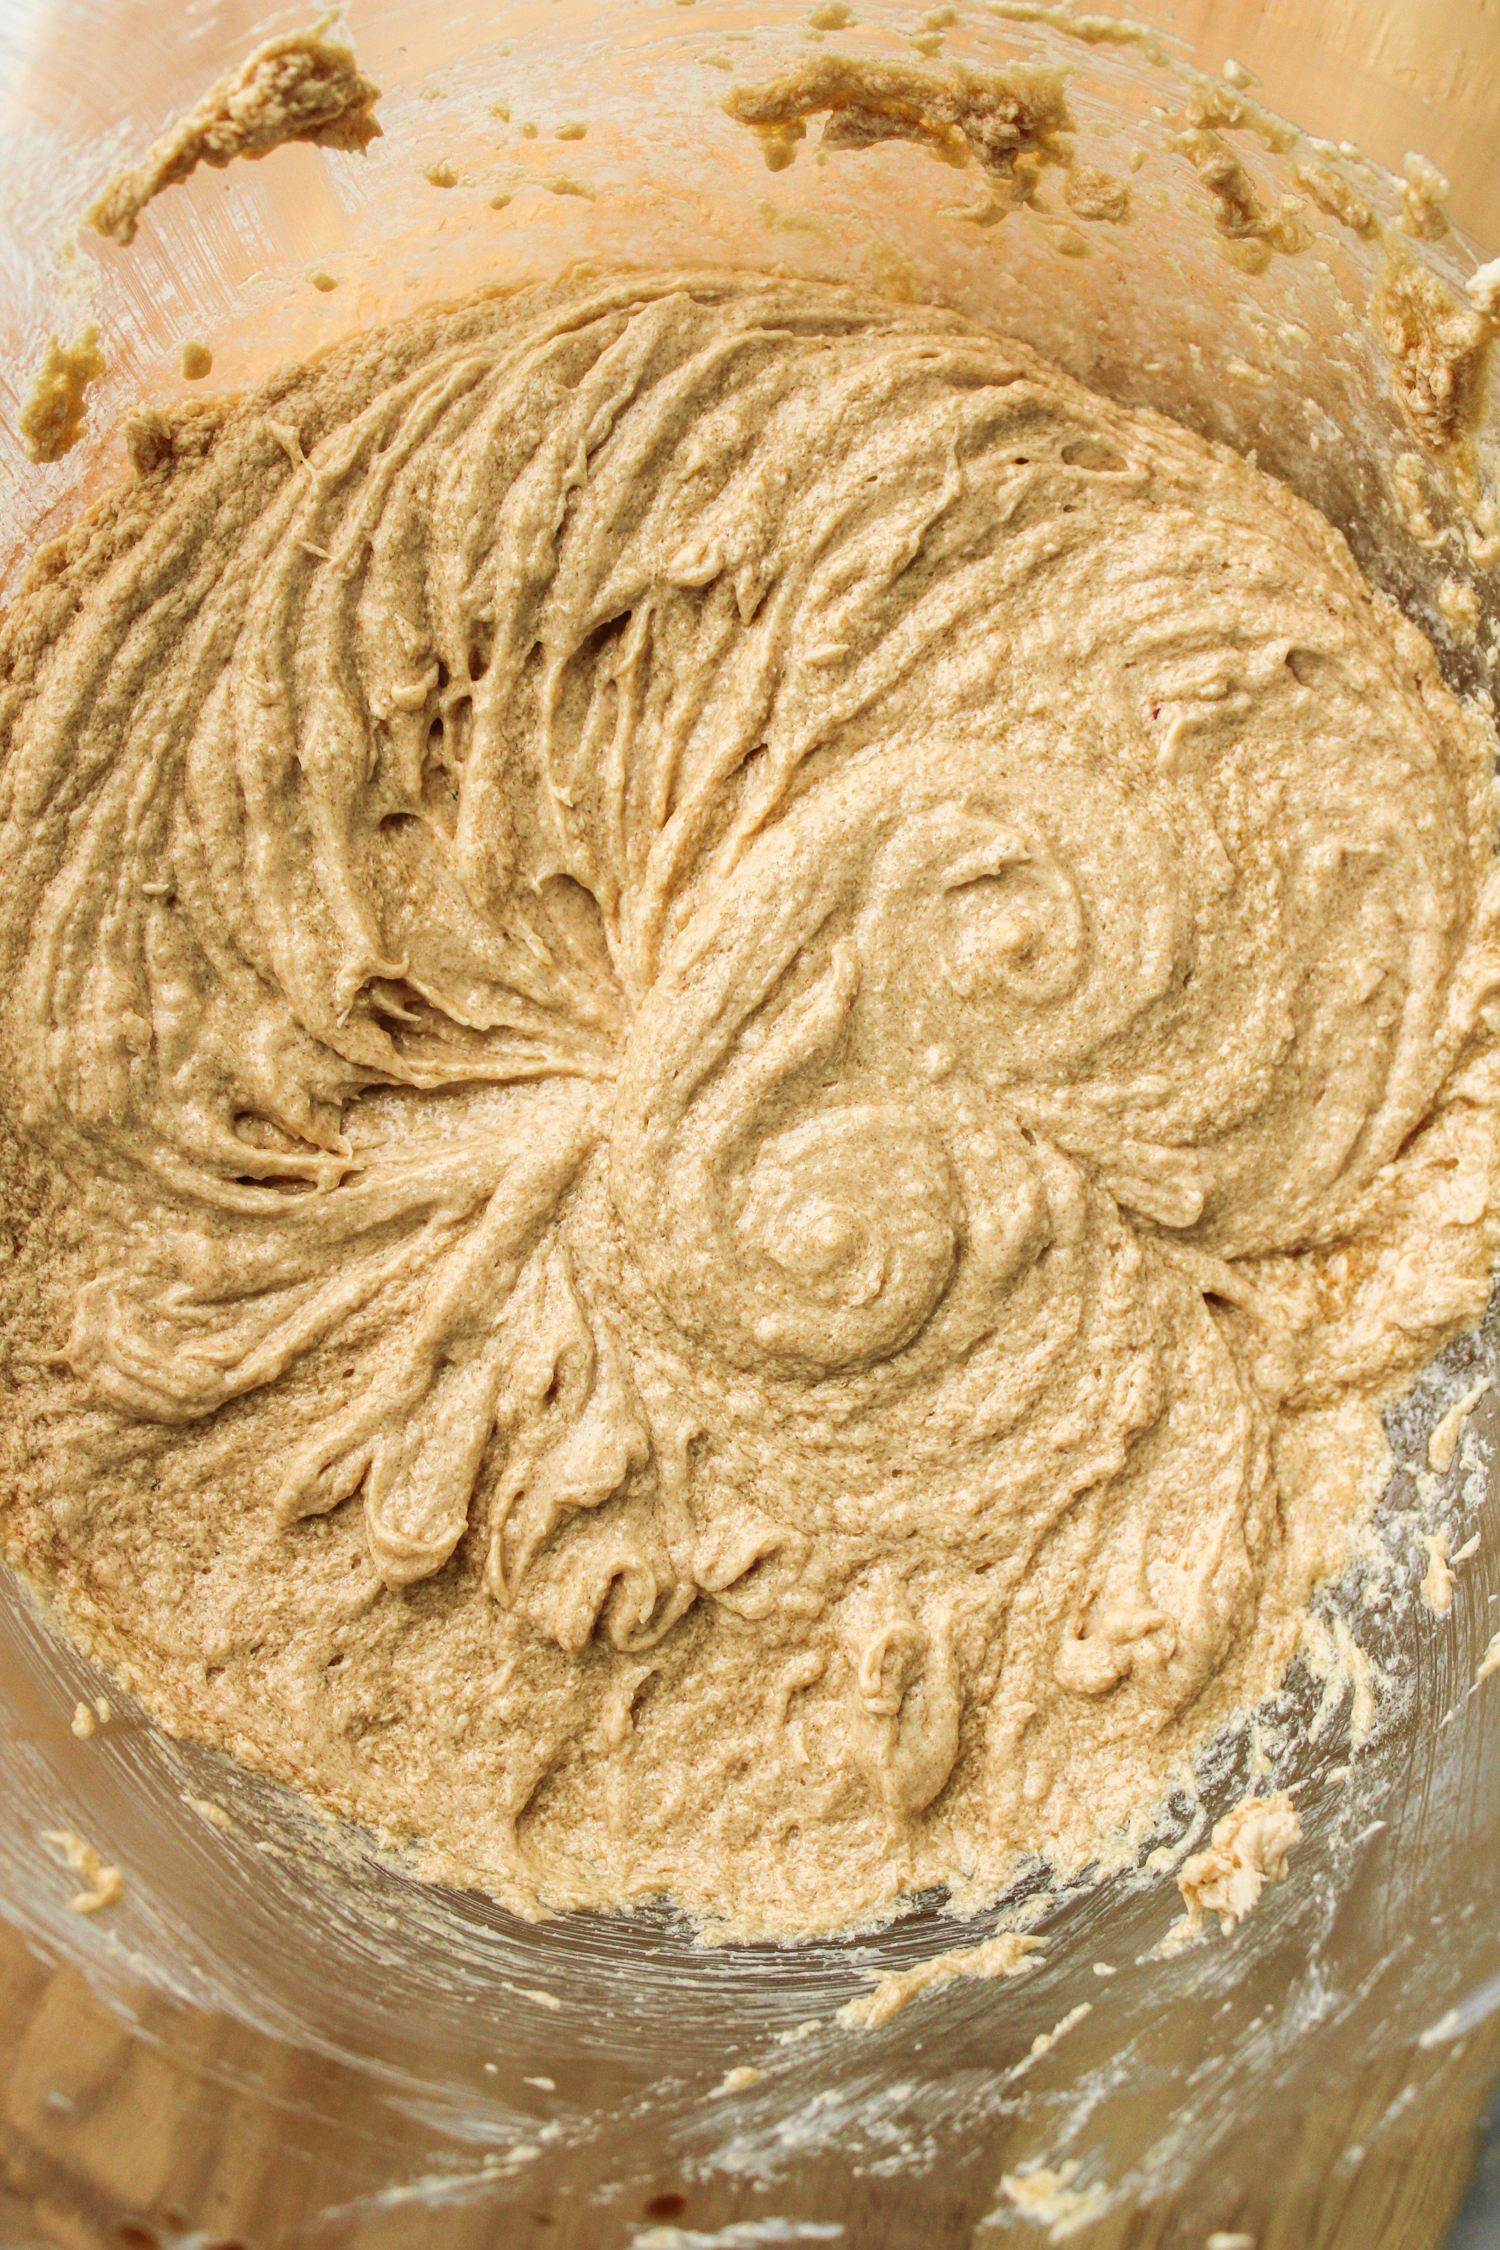
- In a large bowl, add the room temperature butter and brown sugar. Using a hand mixer or a stand mixer, mix on medium-high for 1-2 minutes or until the butter and sugar are creamed together. Add the white sugar to this and mix it again until everything is well incorporated and fluffy.
- Add the egg and vanilla extract and mix again.
- Next, it’s on to the rest of the dry ingredients! Add the all purpose flour, salt and baking soda and mix again.
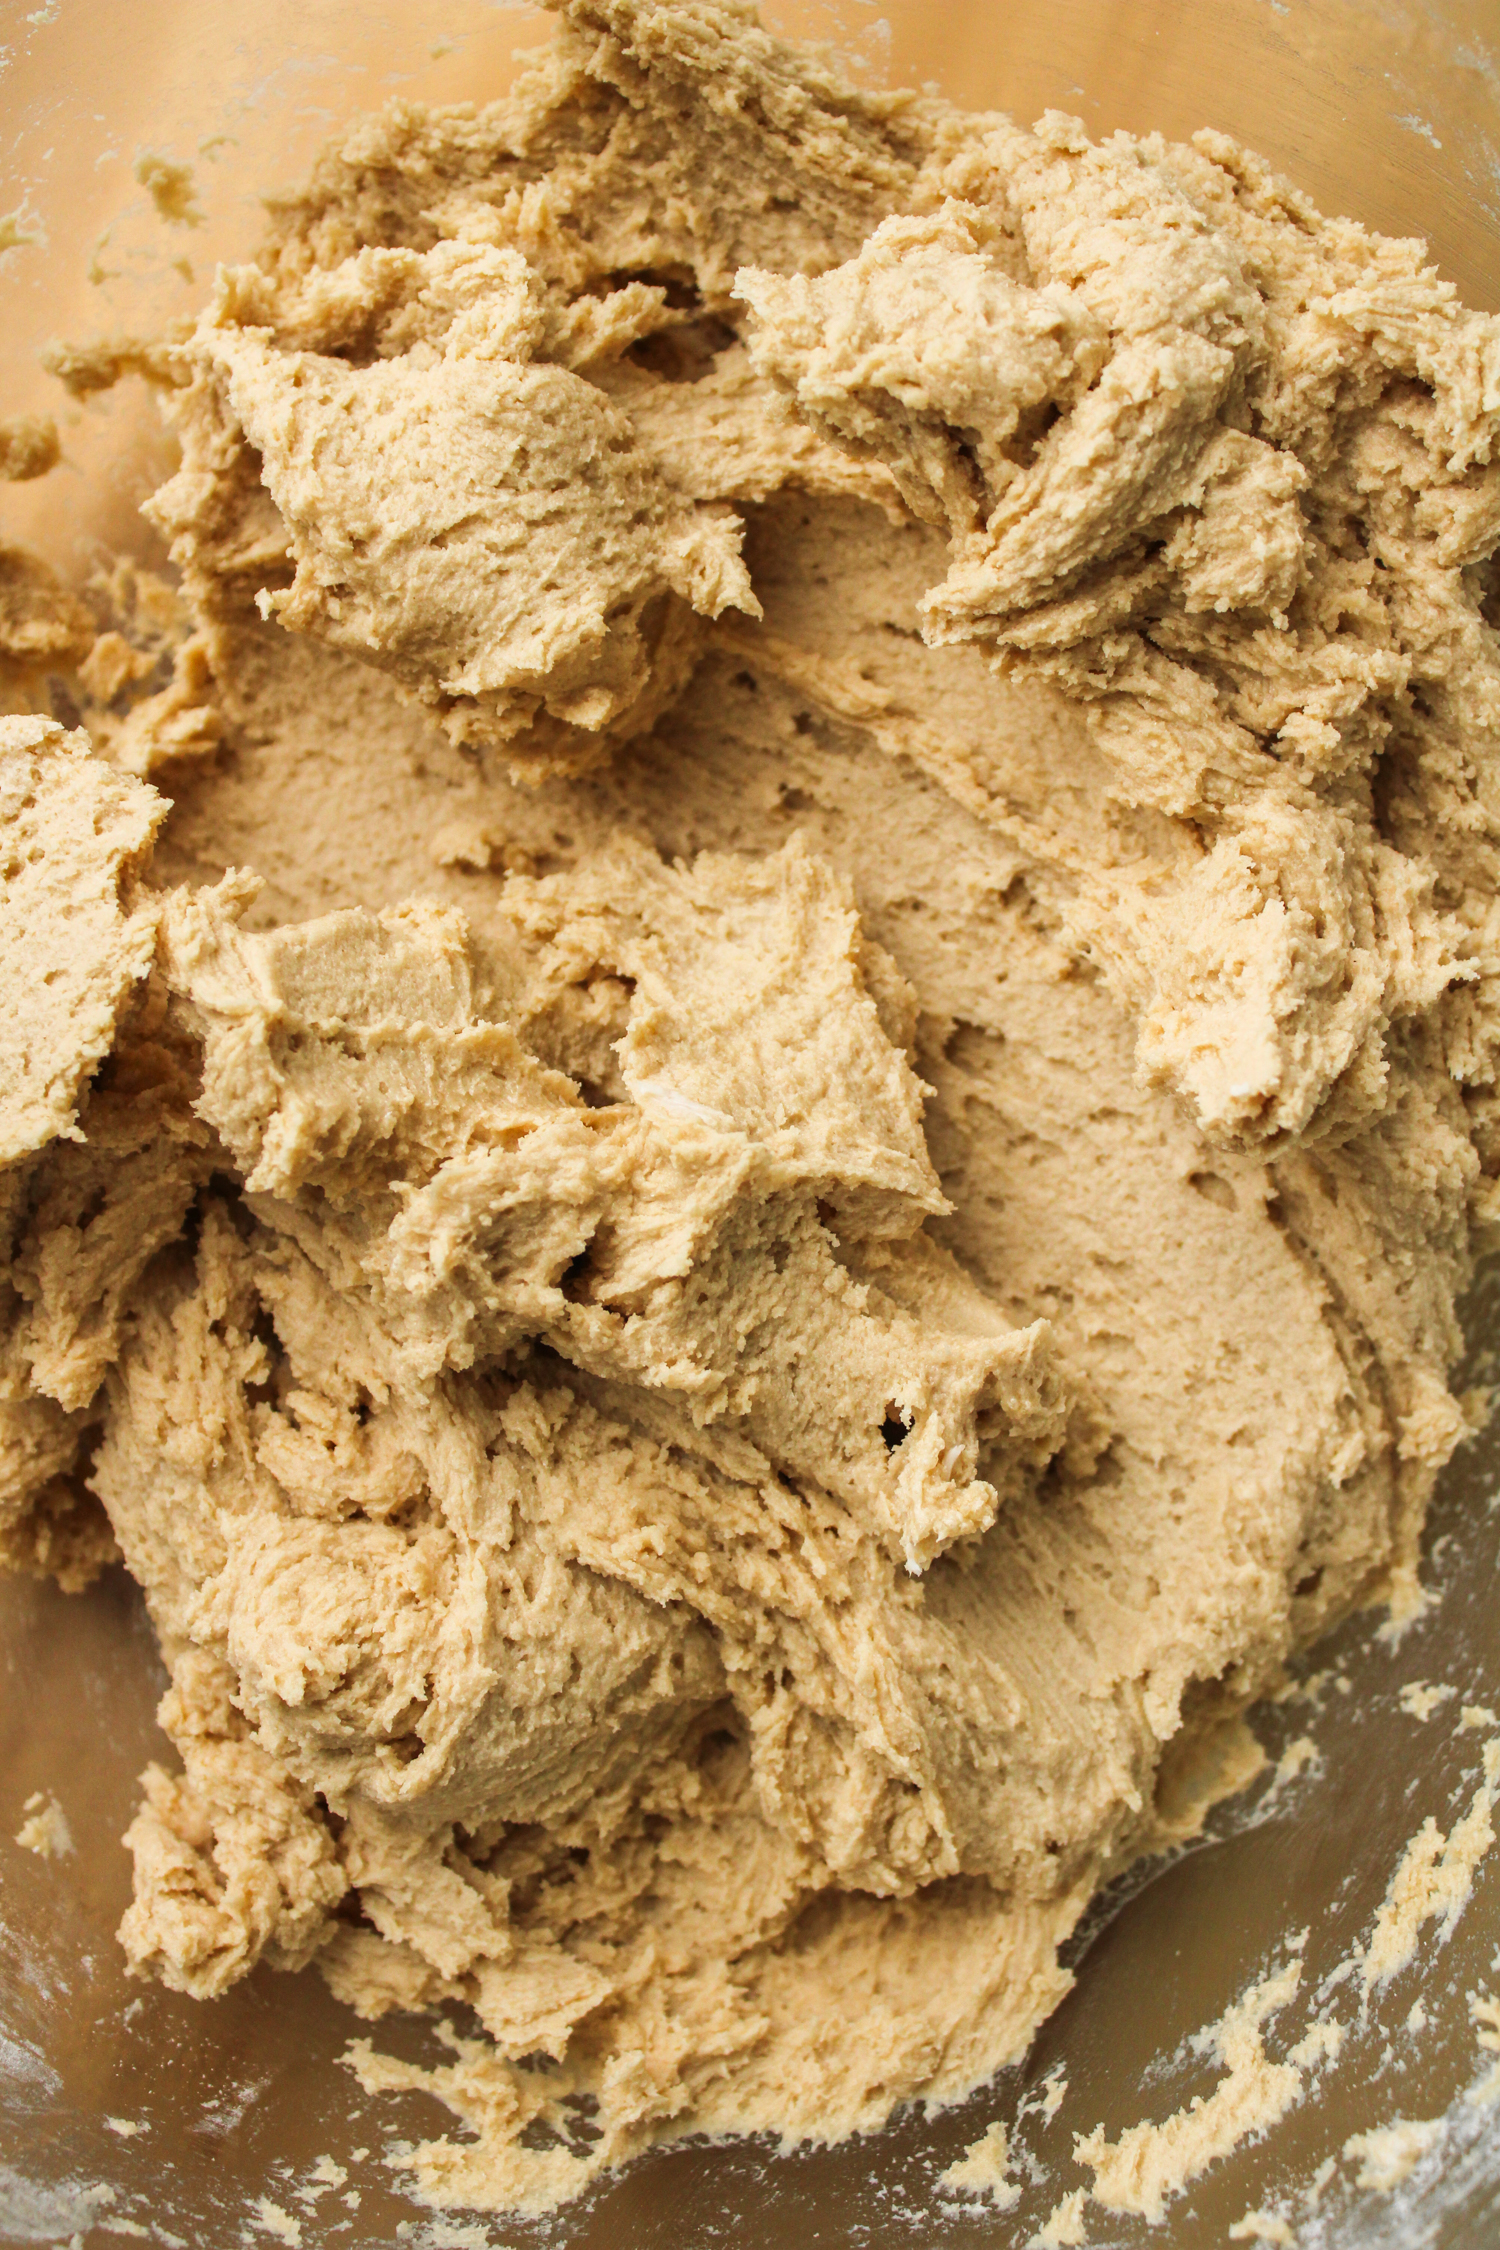
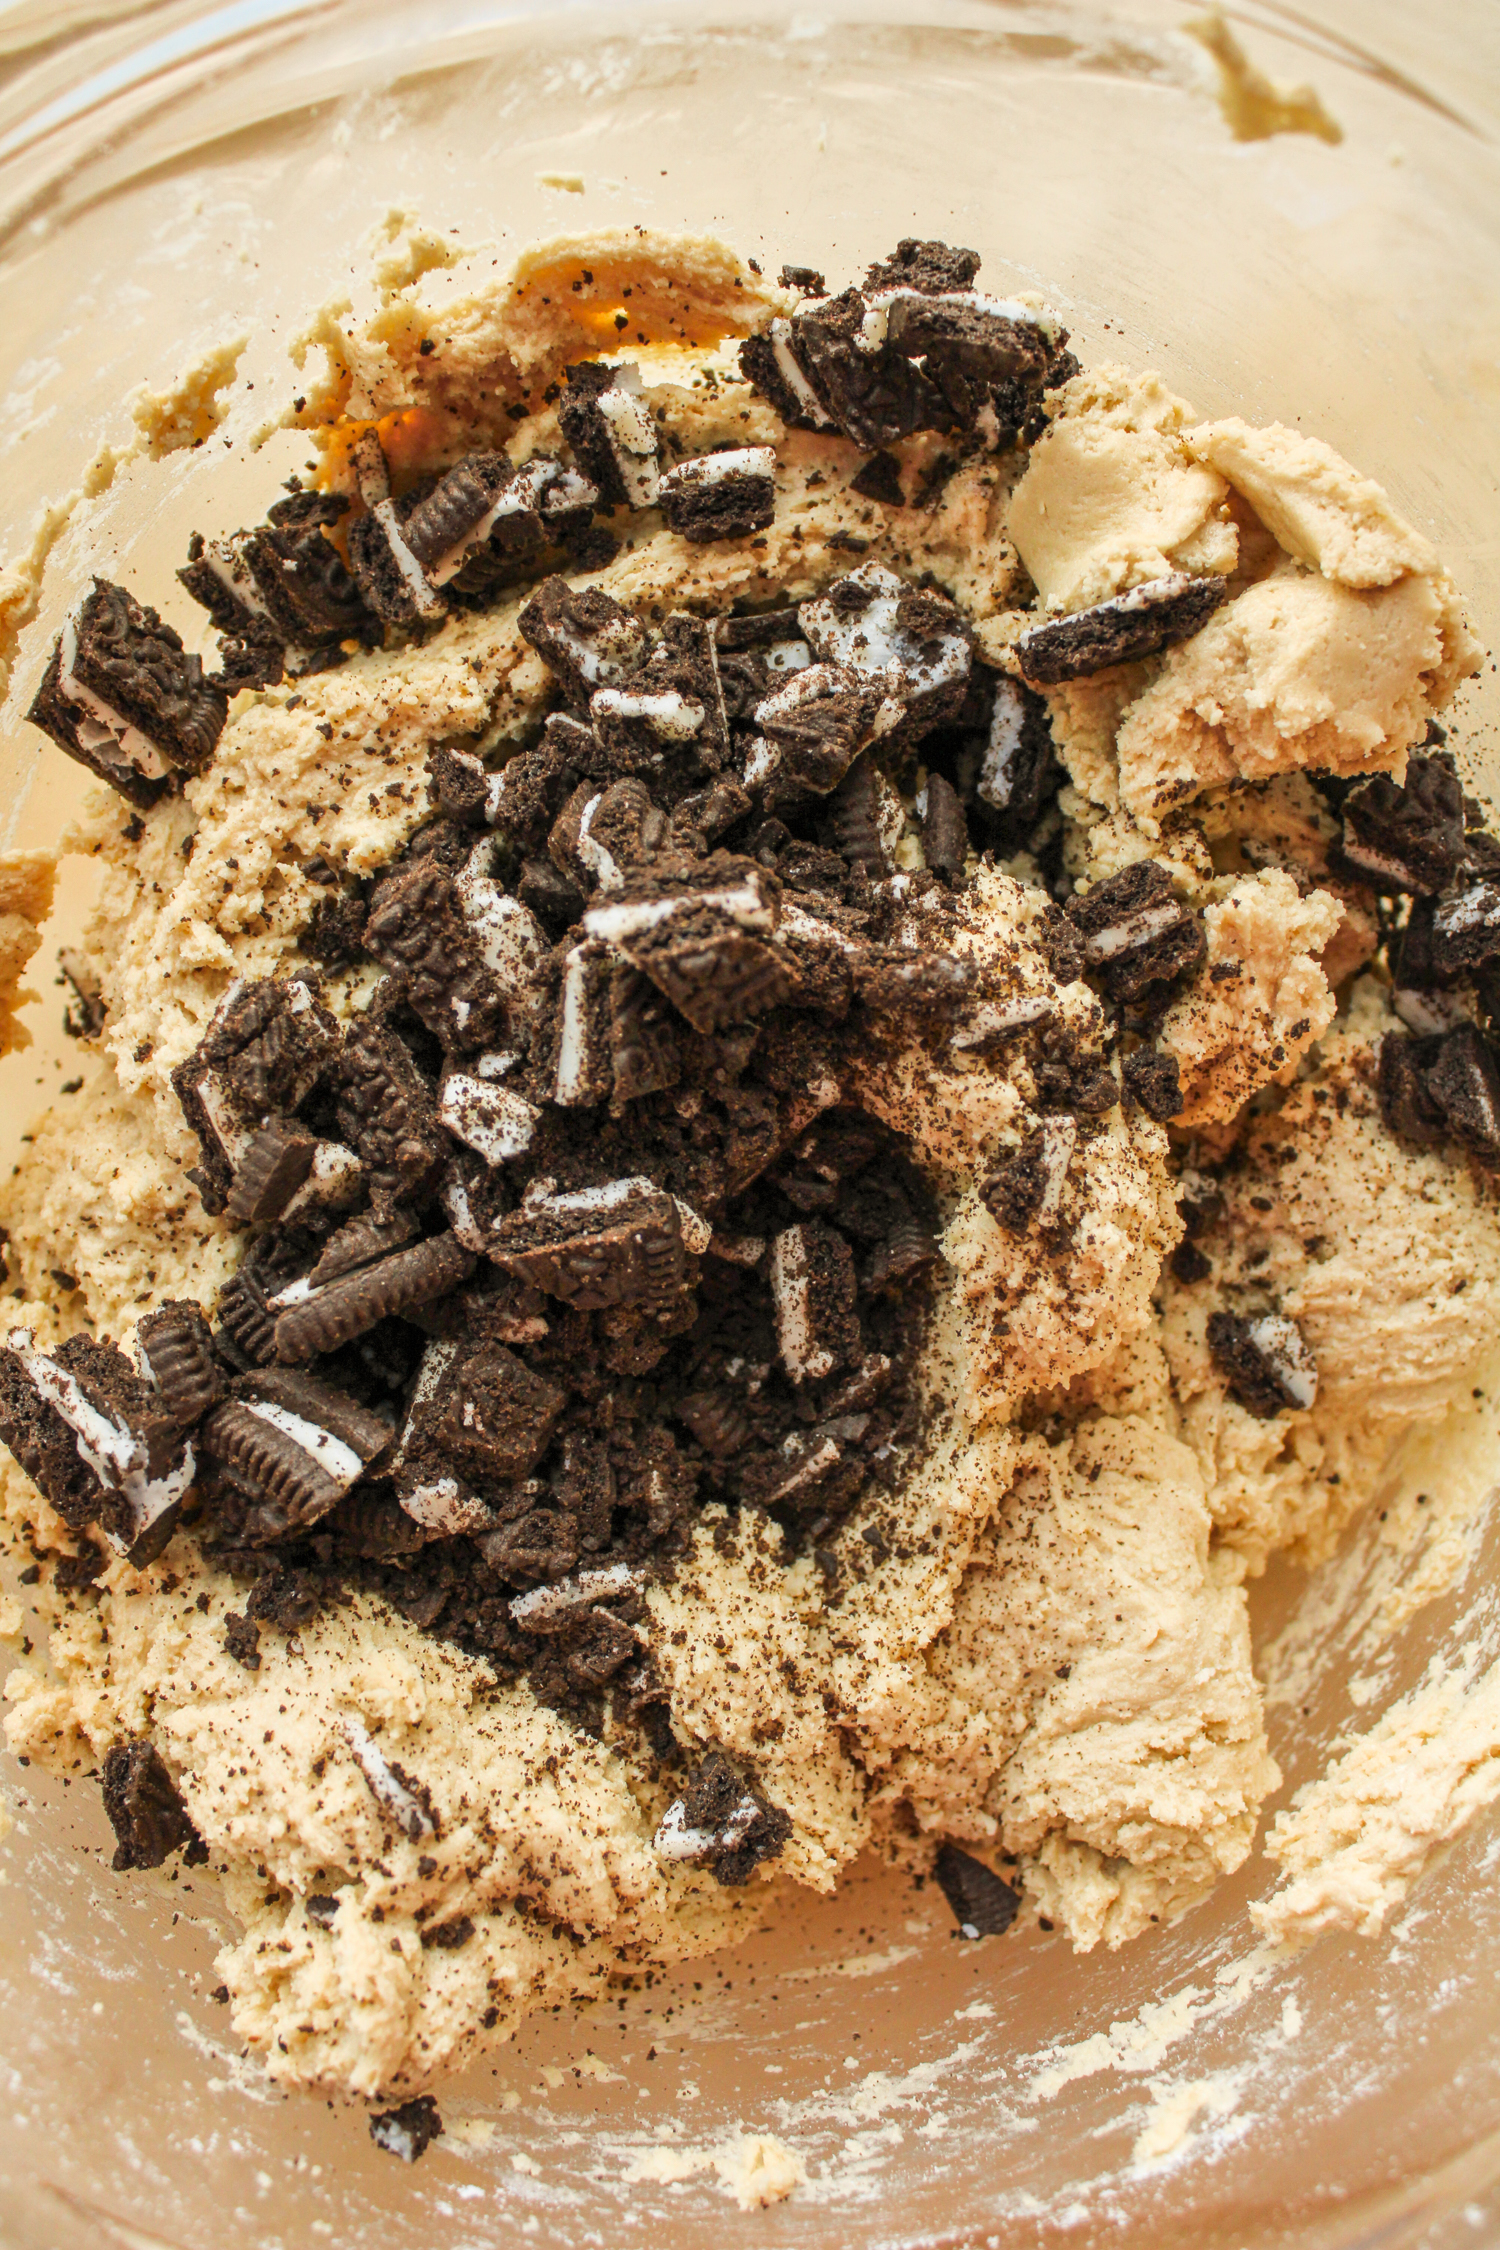
- We can’t forget about the stars of the show: chopped Oreos and chocolate chips! Using a wooden spoon or spatula, fold in the Oreos and chocolate chips until they are just incorporated. Try not to overmix the batter!
- Using a cookie scoop or spoon, distribute 1-2 tbsp of dough onto the prepared or lined baking sheet. Make sure the cookie dough balls are all evenly spread apart on the tray.
- Place them in the oven for 10-12 minutes. The cookies may look slightly underbaked but this is what we want! Remove them from the oven and allow them to cook for 5-10 minutes. As long as the bottoms of the cookies are a light golden brown, they’re done! Enjoy!
Baking tips
There are a few key steps in the baking process that, if done correctly, will help make the most perfect and delicious cookies!
- Getting butter to room temperature: if you forgot to take the sticks of butter out of the fridge in time for it to warm up, I actually recommend placing the wrapped stick of butter in your pant waist band for several minutes. The heat of your body will warm up the butter without melting it. Just rotate it every few minutes so it warms it up evenly. It sounds weird but it works!
- Baking large cookies: If you choose to use a large cookie scoop to make extra big cookies, you just may need to adjust the baking time slightly. Depending on the size of the cookie, it could require an additional 2-3 minutes of bake time.
- Underbake!!!: If you take one tip away from this recipe, it’s to underbake your cookies. Not to the point where they are still raw, of course. But enough that you’re a little unsure whether they’re fully cooked. They will continue baking when you take them out of the oven and leave them to rest for 5 minutes. But this method ensures the baked cookie is irresistibly soft and chewy! The recommended baking time for this recipe should result in a slightly underbaked cookie so no need to make adjustments, unless your oven is much hotter.
Should the cookies be hard or soft?
Everyone has their own personal opinion on how soft, chewy or crunchy a cookie should be. There is no judgement from me on your preference, but this Oreo Chocolate Chip Cookie recipe creates the most perfectly soft and chewy cookie at room temperature.
If you prefer your cookies to be hard and crunchy, I recommend flattening the cookie dough on the baking sheet before placing it in the oven. You may also want to bake the cookies for 2-3 minutes longer to achieve that texture.
Why did my chocolate chip cookies spread so much?
There are a few baking mistakes that could make your Oreo Chocolate Chip Cookies spread too much and end up flat. The most common is that there is too much fat in the dough. The fat element in baked goods is typically butter or oil. Make sure you follow the recommended ratio of butter to dry ingredients!
Another reason why the cookies could spread is because there isn’t enough flour or there is too much liquid. Melting the butter could cause the batter to be liquidy, which we want to avoid. Use room temperature butter and add the suggested amount of flour.
As long as you follow the instructions step by step, these Oreo and Chocolate Chip Cookies should come out of the oven perfectly fluffy and chewy!
Make these cookies gluten free
If you want these Oreo and Chocolate Chip Cookies to be gluten free, there are two main substitutions to make to the ingredient list. Instead of all purpose flour, opt for a gluten free flour. My favourite gluten free flour to use in baking is the Bob’s Red Mill gluten free 1-to-1 baking flour. There’s no need to adjust the amount, just use it in the way you would use regular flour!
Gluten plays a role in binding the cookie dough together, so you may notice a slight change in texture if you use gluten free flour.
You will also have to use gluten-free Oreos, which can be found at some grocery stores.
Storing and freezing
The storing method of these cookies depends on when you want to enjoy them.
If you plan on eating them within a week, I would suggest leaving them at room temperature for 2-3 days. In my opinion, the texture and flavours are the best when they are at room temperature. After this, pop them in an airtight container and store them in the fridge until they’re gone!
Alternatively, you can freeze them. If you ever plan on baking ahead of a big holiday or event and want to store the cookies until the celebrations, you absolutely can! Or perhaps you just want to have one every once in a while but keep the rest of the batch fresh.
Here’s how to do that: once the cookies have baked and cooled to room temperature, transfer them to an airtight container. This could be a glass or plastic container or even a freezer bag! Store them in the freezer for up to 3 months. When you’re ready to enjoy them, either take them out 1-2 hours in advance or microwave them for 15-20 seconds, or until they reach your preferred temperature and texture. Enjoy!
Dietary considerations
As a dietitian, I try to create recipes that can be made in multiple ways to suit various dietary restrictions.
- To make these cookies gluten free, see my suggestions above.
- Dairy free: opt for dairy free butter and chocolate chips. Oreos are actually dairy free and vegan!
- This recipe is already nut free.
More cookie recipes that you’ll love!
- Pistachio Chocolate Chip Cookies
- Hazelnut Chocolate Chip Cookies
- Almond Pistachio Cookies
- Brown Butter Shortbread Cookies
- Papa’s Classic Oatmeal Cookies
If you make these Oreo and Chocolate Chip Cookies, I would love to see your comment and rating below. It also makes my day seeing your creation of my recipes on Instagram- don’t forget to tag @allnutrition.rd!
Oreo and Chocolate Chip Cookies
Ingredients
- 1 ½ cups all purpose flour
- ½ cup salted butter
- ⅓ cup brown sugar
- ⅓ cup white sugar
- 1 large egg
- 1 tsp vanilla extract
- 1 tsp baking soda
- ½ tsp salt
- 5-7 Oreo cookies chopped
- ⅓ cup semi-sweet chocolate chips
Instructions
- Preheat the oven to 350℉ and prepare a baking sheet by greasing it with butter or lining it with parchment paper, tin foil or a silicone baking mat.
- In a large bowl, add the butter and brown sugar. Using a hand mixer, mix on medium-high for 1-2 minutes or until incorporated and lightly fluffy. Add the white granulated sugar and mix again until incorporated.
- Add the egg and vanilla extract and mix. Add the all purpose flour, salt and baking soda and mix for the last time (this can be done with a spatula instead of the hand mixer).
- Using a wooden spoon or spatula, fold in the chopped Oreo cookies and chocolate chips until they are just incorporated.
- Using a cookie scoop or spoon, distribute 1-2 tbsp of dough onto the prepared baking sheet, making sure they are evenly spread apart.
- Bake the cookies for 10-12 minutes. The cookies will look slightly underbaked but remove them from the oven. Just make sure the bottom of the cookies are a light golden brown and then let them cool for at least 5-10 minutes. Enjoy!
Notes
Substitutions and add-ins
- Gluten free flour
- To make these cookies gluten free, use gluten free all purpose 1:1 flour in the same amount that’s recommended for the all purpose flour. You may not get the same chewy texture with the gluten free flour but the flavour will be very similar!
- Unsalted butter
- I use salted butter in baking because I feel like a little extra salt goes a long way in amplifying the flavour. However, you can use unsalted butter if that’s what you have or if you’re being mindful of your sodium intake.
- Coconut oil
- This can be used instead of the butter and for extra coconut flavour. Make sure that it’s at room temperature before mixing it with the brown sugar.
- Other types of brown sugar
- Any kind of brown sugar will work in this recipe.
- Sweetened or unsweetened shredded coconut
- You can use whatever product you have available. This can also be a way to adjust the sweetness of the cookies. If you want them extra sweet, use sweetened shredded coconut.
- Flaked coconut
- If you want larger chunks of dried coconut in the cookies, use flaked coconut instead of shredded!
- Chopped nuts
- Nuts such as almond, pistachios, pecans and walnuts could all be chopped and added to the cookie batter for more crunch. Just make sure to buy the unsalted version.
- Mini chocolate chips or chocolate chunks (white, milk, semi-sweet or dark)
- Feel free to play around with the size and shape of the added chocolate.
Dietary considerations
- Gluten free: use gluten-free 1-to-1 baking flour instead of all-purpose flour. Use gluten-free Oreos instead of regular Oreos.
- Dairy free: opt for dairy free butter and chocolate chips.
- This recipe is already nut free.
Leave a Reply

© 2024 Ashlen Leonard. all rights reserved. | privacy policy + Terms | site by sugar studios + Customized by Amanda Mays


Food for a happy and healthy life